Schedule a Date-Triggered Campaign
When building an Email Campaign, Marigold supports two different data sources:
• A table in the Engage+ database
• The Engagement Data Platform (EDP)
As described below, the Campaign scheduling options vary slightly between the two data sources.
Scheduling Options
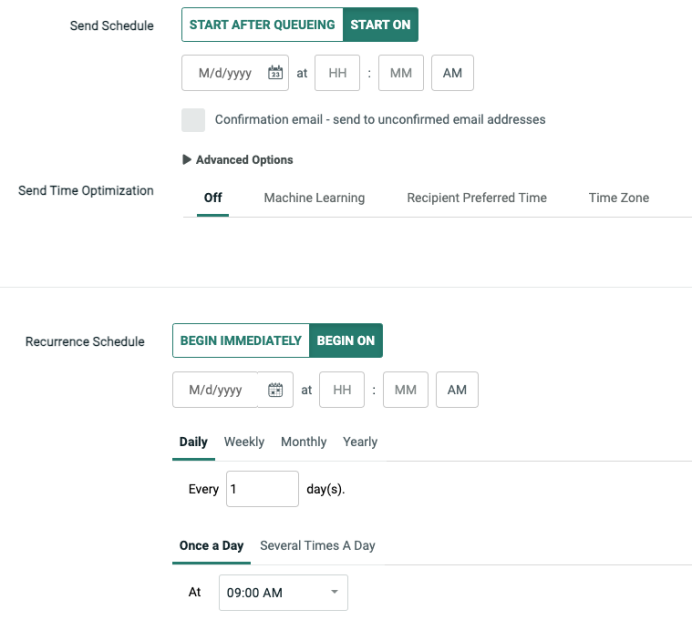
Date-triggered Campaigns send messages to recipients based on a recurring schedule.
For a Date-triggered Campaign that uses a Engage+ table at its data source, the Campaign progresses through two separate phases after it's launched: building messages and sending messages. Both phases are controlled by the Recurrence Schedule Frequency, which defines when, and how often, the Campaign will execute.
The default setting for both the Recurrence and Send Schedules is to go "live" immediately when the Campaign is launched. The default Recurrence Schedule Frequency is once daily, every day, at 9:00 AM.
1. Delay both schedules
You can delay the Recurrence and / or Send Schedules to go "live" at some point in the future, after the Campaign is launched.
-
Navigate to the Campaign, and select the Review tab.
-
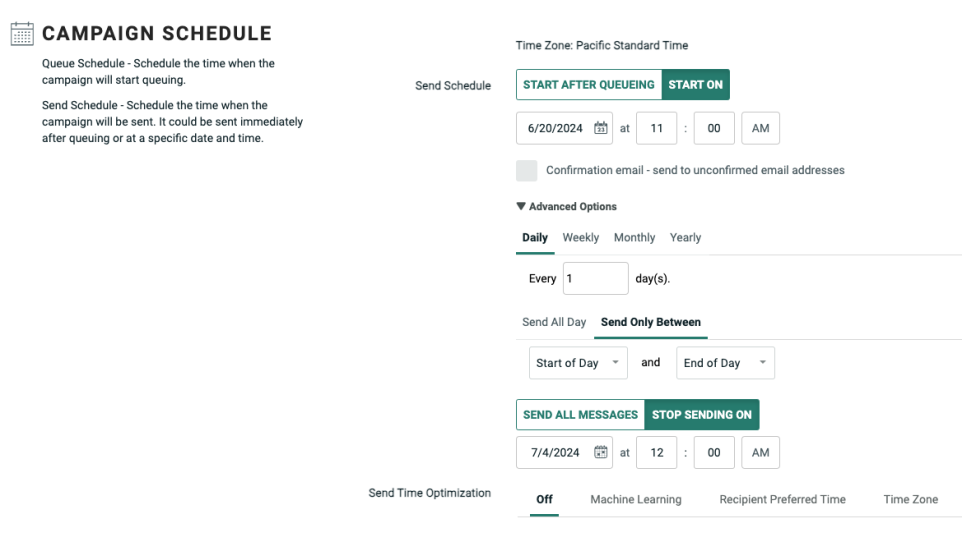
Within the Campaign Schedule section, to define when you want the Send Schedule to go "live," click Start on and enter the appropriate date and time.
-
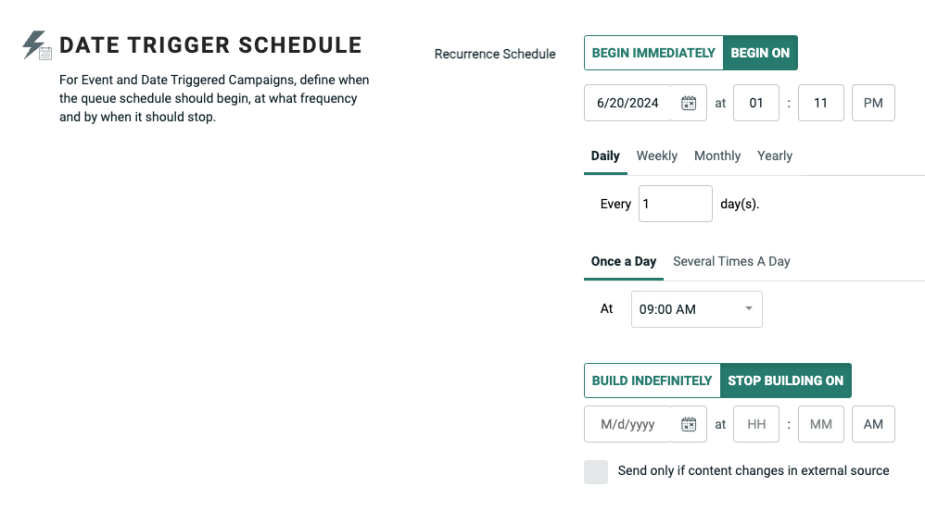
Within the Date Trigger Schedule section, to define when you want the Recurrence Schedule to go "live," click Begin on and enter the appropriate date and time.
Schedule a Date-triggered Campaign
2. Set a Recurrence Schedule Frequency
The default Recurrence Schedule Frequency is once daily, every day, at 9:00 AM. To define a custom Recurrence Schedule Frequency:
-
Navigate to the Campaign, and select the Review tab.
-
Within the Date Trigger Schedule section, select the frequency unit of time – Daily, Weekly, Monthly, or Yearly.
-
Define the frequency interval.
-
Define the time of day when the Campaign should execute:
-
Once a Day: Select a time.
-
Several Times a Day: Define an interval in minutes or hours.
3. Define a Sending Window
You can define a daily Sending Window. The platform will send messages only during this Sending Window.
-
Navigate to the Campaign, and select the Review tab.
-
In the Campaign Schedule section, expand Advanced Options.
-
Select the Send Only Between tab.
-
Enter the start and end times of the Sending Window.
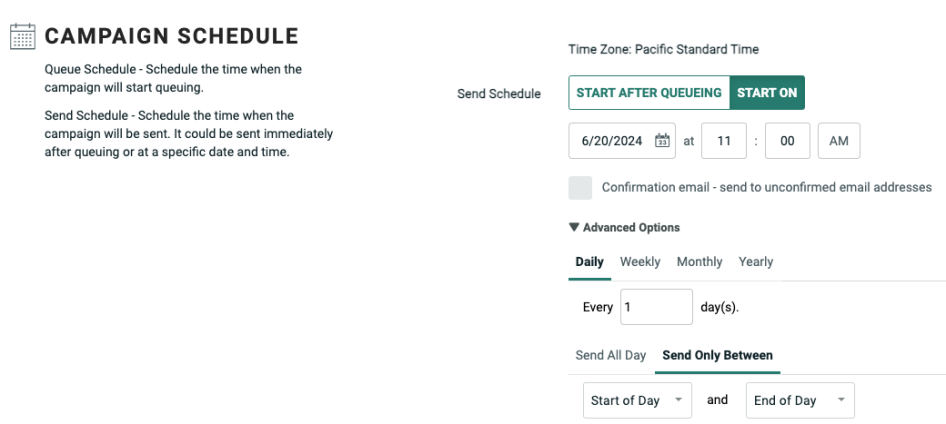
Note: If the Campaign doesn't complete the sending process during the Sending Window, the remaining recipients will stay held in the queue until the next window.
4. Stop a Recurrence and / or Send Schedule
By default, a Date-triggered Campaign will run indefinitely. You can define a date / time to stop the Recurrence Schedule and / or the Send Schedule.
To set a stop date for the Send Schedule:
-
Navigate to the Campaign, and select the Review tab.
-
In the Campaign Schedule section, expand Advanced Options.
-
Click Stop Sending On.
-
Enter the date / time.
To set a stop date for the Recurrence Schedule:
-
Navigate to the Campaign, and select the Review tab.
-
In the Date Trigger Schedule section, click Stop Building On.
-
Enter the date / time.
Send Time Optimization
Send Time Optimization (STO) allows you to derive the best time to contact each recipient within the Campaign's audience.
Marigold will deploy messages to each recipient based on their preferred time of day. The platform will hold messages in the queue until the recipient's preferred send time is reached, which may cause the total Campaign deployment to take longer. As an example, let's say you launch a Campaign at 11:00 AM, and a recipient has a preferred send time of 8:00 AM. The platform will hold this message in the queue until 8:00 AM the next day, then send it.
If the STO process is unable to identify a preferred sending time for a recipient, or if STO is unsupported for a recipient, the platform will revert to using the Send Schedule defined for the Campaign, or to using the Default Sending Time (described below) if one is defined.
Engage+ supports several options for Send Time Optimization, each of which are described below.
5. Machine Learning
ML STO helps you optimize message send time to the best hour of the day, for each person. To do this, we run Machine Learning (ML) models on email opens and clicks to determine the best hour of the day, per person.
-
Navigate to the Campaign, and select the Review tab.
-
Next to Send Time Optimization, select the Machine Learning tab.
-
From the drop-down menu, select the recipient activity field on which you want to base the Send Time Optimization.
-
Optionally, check Default Sending Time and enter a time. The Default Sending Time applies to Control Group recipients and all recipients where the platform was unable to derive a Recommended Time.
6. Postal Code
The Postal Code option uses a Postal Code field to optimize Campaign deployment based on each recipient's local time. To use this feature, the Campaign's source table must have a dedicated Postal Code field.
Note: This feature is available only for recipients who live in the United States.
-
Navigate to the Campaign, and select the Review tab.
-
Next to Send Time Optimization, select the Recipient Preferred Time tab.
-
Select the Recipient Postal Code radio button.
-
From the drop-down menu, select the desired Postal Code field.
7. Recipient Preferred Time
The Recipient Preferred Time option lets you optimize Campaign deployment based on data imported into the platform from a third-party source. The Preferred Time must be stored in a Date / Time field. The platform will consider only the hour component of the Date / Time value; the date, minute, and second components are ignored.
-
Navigate to the Campaign, and select the Review tab.
-
Next to Send Time Optimization, select the Recipient Preferred Time tab.
-
Select the Recipient Preferred Time radio button.
-
From the drop-down menu, select the field in the Engage+ table that contains the preferred time data.
-
Optionally, check Combine with Recipient Postal Code, then select a Postal Code field that you want to use to derive each recipient's time zone.
EDP Campaigns
Campaigns that use EDP as the data source utilize a different flow than Campaigns that use a Engage+ table as the data source. Because of this different flow, the concept of an "advance queue" (that is, queueing email messages up for some period of time prior to deployment) is not supported in EDP-driven Campaigns. Therefore, you can't define separate schedules for the message building phase and for the message sending phase, as you can for Campaigns built off a Messaging table. Instead, you must define a single Recurrence Schedule and Frequency, which encompasses both phases.
8. Define the Recurrence Schedule
To define the Recurrence Schedule for an EDP-driven Campaign:
-
Navigate to the Campaign, and select the Review tab.
-
Next to Recurrence Schedule, select either:
-
Begin Immediately: Start the Recurrence Schedule immediately when the Campaign is launched (this option is selected by default).
-
Begin On: Start the Recurrence Schedule at the specified date / time.
9. Set a Recurrence Schedule Frequency
The default Recurrence Schedule Frequency is once daily, every day, at 9:00 AM. To define a custom Recurrence Schedule Frequency:
-
Within the Date Trigger Schedule section, select the frequency unit of time – Daily, Weekly, Monthly, or Yearly.
-
Define the frequency interval.
-
Define the time of day when the Campaign should execute:
-
Once a Day: Select a time.
-
Several Times a Day: Define an interval in minutes or hours.
10. Stop a Recurrence Schedule
By default, a Date-triggered Campaign will run indefinitely. You can define a date / time to stop the Recurrence Schedule.
1. Navigate to the Campaign, and select the Review tab.
2. In the Date Trigger Schedule section, click Stop Building On.
3. Enter the date / time.
